
 Installation must be carried out by a competent person in accordance with BS 7671 and applicable UK regulations.
Overview
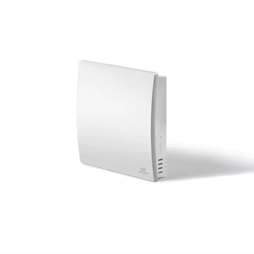
The MCO A2 Sensor is a mains powered air quality sensor that reports CO2 (ppm), Air Temperature and Relative Humidity. It is our recommended choice where monitoring of CO2 is required or where temperature/humidity monitoring is required in additional areas of the home (e.g. mould concerns in one particular room). It measures the following properties:
- Air Temperature (-10 ~ 50℃)
- Relative Humidity (5%RH ~ 95%RH)
- CO2 / carbon dioxide ( 0 ~ 5000 ppm)
- PM2.5 particulate matter (0 - 500 ug/m3)
- VOC volatile organic compounds (0 - 65000 ug/m3)
Product specifications
| Specification | Range/Info |
| Power supply | DC/AC12-24V or lithium battery |
| CO2 display range | 0-5000ppm |
| PM2.5 | 0 - 500 ug/m3 |
| VOC | 0 - 65000 ug/m3 |
| Temperature range | -10 - 50°C |
| Humidity range | 5 - 95%RH |
| Work environment | -10 - 50°C 5 - 95%RH (Non condensation) |
| Housing | ABS + PC |
| Dimension | 89mm x 89mm x 20.5mm |
| Installation | Wall-mounted (vertical) |
| Communication protocol | Z-wave |
Installation
When installing the MCO Home Sensor, it is important to consider the location of where this will be installed. There are two tips for this:
- The MCO Home Sensor must be installed vertically on a wall. This will be ideally in a location where significant data would be recorded, such as the bedroom or kitchen (provided the Switchee isn’t located in either of these)

- The bottom of the sensor must not be covered. This is because the sensors are located at the bottom of the MCO Home Sensor, and by obstructing this it will lead to insignificant and erroneous data being collected.
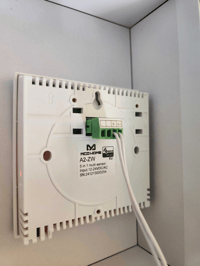
It is recommended to fit the sensor into a back box as the sensor has a green terminal block on the back.
Pairing to the Switchee
- Access the Z-wave pairing menu on the Switchee via:
- Tap on the Spanner (top left)
- Next x2
- Admin (Pin is 0123)
- Z-Wave Sensors
- Select ‘Pair/Unpair Sensors’
- Select ‘Pair new sensor’. This puts the Switchee into pairing mode for 2 minutes.
- Press the side button on the A2 sensor 3 times in succession and the LED will keep flashing until paired. Once paired, the Switchee will indicate that a new device has been included/added.
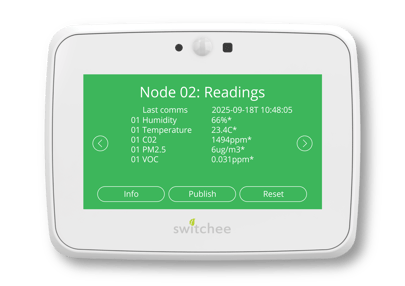
- To verify successful pairing, select ‘Sensor Readings’ and wait a few minutes for the sensor data to populate. Example shown below:
Unpairing from the Switchee
- Access the Z-wave pairing menu on the Switchee via:
- Tap on the Spanner (top left)
- Next x2
- Admin (Pin is 0123)
- Z-Wave Sensors
- Select ‘Pair/Unpair Sensors’
- Select ‘Unpair existing sensor’. This puts the Switchee into unpairing mode for 2 minutes.
- Press the side button on the A2 sensor 3 times in succession. Once unpaired, the Switchee will indicate that a new device has been removed/excluded.
LED indicator
When the device is powered on, the LED indicator will light up red. To turn off the LED, press the side button once; to turn the LED back on, press the side button again.
Factory resetting the A2-ZW
Press the side button 10 times in succession to restore the sensor’s factory setting.
For more support, contact our installer support team directly on:
Tel: 0800 133 7957 | Email: install@switchee.com
To book any further installation training with Switchee, click here